I am a Senior Applications Programmer / Analyst with years of experience developing enterprise solutions using the Microsoft technology stack including C#, VB.NET, ASP.NET, AJAX, IIS and SQL Server.
I specialize in Web application development with a focus on building secure systems, integrating applications, and designing robust database structures.
Today I was checking into how best to look at the HTTP headers that get returned from a site. I was checking based on a site security report that was asking me to look into several headers that seemed to be getting returned but that I wanted to verify.
After searching around a bit, and looking at various tools I came to the conclusion that the best option is to use either curl or PowerShell. These two tools give you the most control over your query but are straightforward to run on any computer.
CURL Query a Site HTTP Headers
If you have Windows 11 or 10 you can run curl from the command prompt. Otherwise for older systems you can download and run curl with minimum fuss.
To do a simple site https headers query with curl enter:
curl -I https://example.com
To see some more details you can set curl to return more verbose output: with the -v switch
curl -I -v https://example.com
PowerShell Query a Site HTTP Headers
You can directly open a PowerShell prompt and type in your query to get the results. Before I give more details here is the code for a PowerShell query to list the HTTP Headers of the site example.com
# Query host headers for the website https://example.com
$uri = "https://example.com/"
$response = Invoke-WebRequest -Uri $uri -Method Head

# Display the host headers
$response.Headers
I like to play around with code and didn’t have Visual Studio Code installed which I’ve heard can be a great PowerShell code editor. So I downloaded Visual Studio Code and set up CoPilot AI assistant with a bunch of its features just for fun.
For the PowerShell part I downloaded and installed two Extensions:
The latest Microsoft PowerShell Library: If you search for PowerShell under Extensions, the official Microsoft one should show up as the first result. I ended up downloading the linked .ZIP and doing the installation from there.
I liked the sound of the Extension called ‘Run in PowerShell‘ that let’s you run your code in a new CMD prompt outside of Visual Studio Code.
How it Worked Out
Both curl and PowerShell returned the same HTTP host header results. Both are very reliable tools free from adware and of course very customizable.
For a simple no-nonsense query, I think curl is best since it can be a simple one-line query in a CMD prompt. Also the verbose output version was interesting to look through.
On the other hand, the PowerShell option gives you the full control of a programming language.
I was looking for some information or examples about how to customize the SharePoint Tree View control, but couldn’t find any examples or information. I managed to customize it so here are my notes about how.
Background Story:
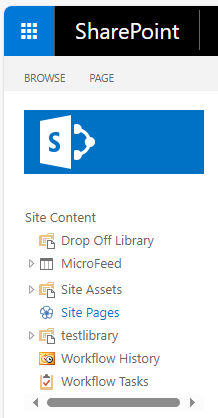
In ‘out of the box’ SharePoint you can enable a cool left hand menu bar for site navigation called a ‘Tree View’ control. This presents site content as an expandable folder structure for your users to easily navigate. It also will let them navigate folder structure within a list such as the folders inside a Document Library control that you add on your site.
In this example I’m working with SharePoint 2016 on prem, but I expect this will be the same with other installations of SharePoints such as 2019 or SharePoint SE.
You can enable the Tree View control as an administrator in SharePoint from ‘Site Settings‘, ‘Look and Feel’, ‘Tree View‘.
Once you’ve added the stock tree view control, you’ll notice that it is fairly bare-bones and would need some customizing to look great. For example if you have many nodes, you’ll notice that the tree view control does not do scrolling but just keeps running down the side menu. Then if you are scrolled down and click on a node, the entire page refreshes and you don’t see the node that you just clicked on.
In this case you’ll want to customize your tree view navigation control to vertically scroll. That way your users can scroll on the navigation left hand side bar to where they want to click, and when they click the main content refreshes and also their location on the left hand menu bar stays in view.
Customizing your Tree View:
Step 1) Get the ID of the Tree View Div tag:
To make your Tree View menu bar scroll, you need to add some custom CSS. Basically the tree view menu is created in HTML surrounded by a Div tag and if you style a height in CSS, then you’ll get the scrolling that you need
To find out the ‘id’ of the tree view control I ended up checking the HTML in Telerik Fiddler. You can also view the page source in notepad, but I’d say Fiddler is best for this.
* IMPORTANT: before you look for the tags that I mention below, make sure to click inside a div on the page, put in an enter or space and click to ‘save’ your changes & customize the page. Then you will see the markup I’m mentioning in SharePoint Designer. The control id to set your CSS to will come from the Fiddler source. Remember, the goal here is to compare the Fiddler HTML source with the Master Page Source in SharePoint designer, and to find the correct area and control names to update.
** ALSO IMPORTANT: When checking my code below in several example sites the tags were named the same. However they might be different for you.
For me the id of the Div tag holding the tree view was: ctl00_PlaceHolderLeftNavBar_ctl04_WebTreeView I expect this name should be similar for different versions of SharePoint. Sure enough I checked the master page for a different site with similar layout and the control id is quite different.
Below is an example HTML snippet that you’ll be looking for. You can see the id of the Div that encapsulates the left hand Tree View as the div at the bottom of this snippet right above the table. Notice also that a good place to inject your CSS without causing errors with the page rendering is to add your CSS right below the top Div tag.
<div id="sideNavBox" role="Navigation" class="ms-dialogHidden ms-forceWrap ms-noList">

-- Add your Style Here --
<div id="DeltaPlaceHolderLeftNavBar" class="ms-core-navigation" role="navigation">
<a id="startNavigation" name="startNavigation" tabIndex="-1"></a>
<div class="ms-core-sideNavBox-removeLeftMargin">
<div id="ctl00_PlaceHolderLeftNavBar_TreeViewNavigationManagerV4" class="ms-tv-box">
<a id="ctl00_PlaceHolderLeftNavBar_idNavLinkSiteHierarchyV4" ...
<div id="ctl00_PlaceHolderLeftNavBar_TreeViewRememberScrollV4" onscroll="javascript:_spOnScroll(this);return false;" style="overflow: auto;">

-- Below is the id of the Div to style the nav bar scrolling --
<div id="ctl00_PlaceHolderLeftNavBar_ctl04_WebTreeView">
<table cellpadding="0" cellspacing="0" style="border-width:0;">
<tr>
In one site the id was ctl00_PlaceHolderLeftNavBar_WebTreeViewV4 and in another site it was ctl00_PlaceHolderLeftNavBar_ctl04_WebTreeView, so make sure that you have the correct id when you adapt the CSS code below.
Identifying the id tag was half the battle. Next was updating the HTML to inject my custom CSS.
Step 2) Open your Master Page in SharePoint Designer 2013
As a next step open your SharePoint site in SharePoint Designer 2013. The left hand navigational menu is coded for in your site’s Master Page. For starters find your default master page and clone it (so you can delete it and start over if you make a mistake). In SharePoint Designer 2013 you can click each master page and the one that is the default will have the top menu option to ‘Set as Default’ grayed out. Alternately you can look under Site Settings, Look and Feel, Master page to find what the name of the default Master page is.
Click on your Cloned Master Page and click ‘Edit File’ so that you can see the HTML/Markup.
Step 3) Find the Markup for the Left Hand Nav Bar
You can’t really add your CSS style just anywhere in the markup of the master page. I found the best location is right below the Div tag for the left hand navigation bar. Search for the Div called id=”sideNavBox” . Here’s the tag and I’d inject my custom CSS in a style tag right below it:
It’s as simple as that. If you save now, you should see that now your tree view control supports vertical scrolling.
Step 5) Update your CSS to Support Browser Zoom Levels
You’ll probably want to customize your CSS to support various browser resolutions rather than have a fixed vertical height for all zoom levels. For example, vertical scrolling that’s optimized for 150% zoom will look surprisingly small at 100% zoom.
You can update your CSS to set different vertical heights for your Tree View based on the user’s browser zoom level. In CSS that’s called the resolution and you can specify this at the dpi level or at the zoom level where 1x is 100% zoom and 1.5x is 150% zoom. Here is the CSS markup where I set the Tree View control height to handle each browser zoom level so that:
Note that at one point the site master page I worked with called the control something slightly different, containing _ctl04_ . In that case I updated the code for the different control name and all worked ok:
Adding your own custom CSS can be super useful and a great way to spruce up stock SharePoint views. You can use the CSS designer of SharePoint Designer but that is clunky at best. All things considered, it’s best to use your own markup if you want to customize your SharePoint views.
For starters let me mention what tools I’m working with in this example. I’m using an old on-premise installation of SharePoint 2016 and to do the editing I’m using SharePoint Designer 2013
Here I’ve decided to inject some CSS into the list view in SharePoint. Specifically the steps are to open the list view in SharePoint Designer, convert the view to editable XSLT, and then to inject some CSS that will alter the layout of the list view.
Note that this will not affect your Document Library List if you embed it on a SharePoint Web page, this is just for the list by itself.
How to Steps
The default style of a SharePoint Document library is very basic so you could use CSS to make it more snazzy. Alternately, you can hide columns that you want available but not visible to the users. Why hide a column? Well, removing the column from your view makes the information in it unavailable to REST calls for example. If you want the information there for system calls but not visible for the average user then you can use CSS to hide the columns from the user. This can really cut down on confusion for end users.
Create a new view for your library… in your SharePoint site, click your library and click ‘New View‘ and then select to ‘Start from an existing view‘ to copy the existing default view. You’ll want your own view version to work with so your original default view remains unchanged.
Go to editing the view (in the Web site click the library and then ‘Modify View‘) and set the style option to ‘Basic Table‘. That way when you open the view in SharePoint Designer you will see the markup as XSLT markup rather than as asp:contentarea zones. The default view is with asp content areas that does not show an HTML table to modify, but the Basic Table View does. The difference in appearance between the views (default and table) is minimal, both seem more or less identical with a simple table format layout, but the basic table view gives you more customizability.
Open your SharePoint site in SharePoint Designer 2013. Click on ‘Lists and Libraries‘ on the left hand navigational sidebar
Select your library and then under the ‘Views‘ section click on the view to modify.
Click on your library, then the Library tab, then on ‘Modify View‘
Just as a reminder: You need to be able to edit the view and to see it in XSLT mode, the default view is entirely ASP content areas which you can’t easily work with. The ‘Basic Table’ view allows you to see things in XSLT markup.
When you first open your view it will not yet be in XSLT markup mode. To enable XSLT view:
Inside one of the lower <asp:Content areas type something and then click to ‘save‘ (alternately click the Edit tab & select HTML and then click ‘Save’)
You should then see a popup prompt where you will click ‘yes’. The prompt should say ‘Saving your changes will customize this page so that it is no longer based on the site definition‘ This is good and will allow you to add your customizations.
After you save close and re-open your view in SharePoint Designer
You can force the system to go to the XSLT mode by selecting the option ‘Customize XSLT‘ in the Top menu bar of SharePoint Designer under the Design tab of ‘List View Tools‘
So to summarize, in the top bar find ‘List View Tools’. Click ‘Design‘ tab. Select the ‘Customize XSLT‘ dropdown and select ‘Customize Entire View‘
Locate the table area within the XSL tags. The table should be close to the top of the document and looks like the following markup:
So to sum things up, from this example you should be able to see how to take a SharePoint Document Library from stock SharePoint and make it look much better than it does out of the box. In this example you can see how to open your Document Library view in SharePoint Designer 2013, convert it to editable XSLT, and inject some CSS of your own to style the library.